
Sunday, June 17, 2012
Recycle Bottle Lamps!


Friday, June 15, 2012
Pineapple Right-Side-Up Cakes!
This post goes out to Wonderful Lisa Wilson!

1 can of pineapple pie filling (20oz)


Be sure to get the cake mix that is "add water only" as directions, but do NOT add any water!!!
1) Line a jelly roll pan w/ foil & lightly spray w/ oil.
2) Carefully, very very very slowly, fold in the pie filling into the cake mix. The cake mix expands quickly with if you mix too much. You do not want this to rise. You want to keep it as flat as you can. Fold it only until most of the powder is moistened. There will be some powder not mixed and that is exactly what you want.
So,
do NOT beat.
do NOT follow the box instructions.
do NOT use a mixer.
3) Pour the batter onto the oiled foiled pan.
4) Spread softly to a rectangle shape, but do NOT spread to edge of pan!
Keep the batter with at least a 1 inch space to the edges of the pan.
This will allow the batter to expand without rising.
5) Bake for 20 minutes at 350F.
6) You MUST set up a chair in front of the oven,
have a cup of coffee,
and your pintrest app at hand,
because you will
NEED TO WATCH
THIS CAKE BAKE!!!
Seriously.
If you mixed the batter too much, it will rise over the edge of your jelly roll pan. If you see this start to happen, remove the pan immediately from the oven and scoop out a bunch of the batter from the sides. Then return to the oven & finish baking.
7) Remove the pan from the oven after completed baking. The edges should be slightly golden, but NOT burnt. (again, if you were sitting in front of the oven you would notice)
8) Sprinker the entire rectangle with powdered sugar.

10) Transfer each individual cake to a cooling rack.
11) Sprinkle w/ powdered sugar
12) Top with each cake with a pineapple ring (from that can you just drained, remember) and a maraschino cherry.

There you have individual Pineapple Right-Side-Up Cakes.
Lisa, we'll need to do your dump cake next!
Saturday, May 26, 2012
takin' to the cleaners...
BATHROOM / TUB / TILE CLEANER

Ingredients
1 3/4 cup baking soda (slightly heaped)
1/2 cup unscented liquid castile soap
2 tbsp water
1 3/4 cup baking soda (slightly heaped)
1/2 cup unscented liquid castile soap
2 tbsp water
10-20 drops Tea Tree essential oil
2 tbsp vinegar
2 ziplock quart-size bags
1 paper clamp
Mash until smooth the baking soda & liquid soap.
Stir in, gently, the water & essential oil.
Stir in, gently, the vinegar. (expect a little bit of fizz)
When paste is complete & creamy, scoop into ziplock bag & seal.
Snip the corner of the bag - as if to use as a frosting piping bag.
Roll up the snipped corner & close with the paper clamp.
Place that inside the second ziplock bag for storage.
Squeeze out onto rag or sponge to use as soft-scrub in bathroom.
adapted from http://www.liverenewed.com/2011/03/non-toxic-bathroom-cleaning-and-homemade-soft-scrub-recipe.html
Saturday, April 21, 2012
Spring Flower Photo Shoot by LittleMiss!

We start by her arranging the flowers any way she likes & then she takes pictures of them. Here's what we start with:

Then MissMommy does some magic & we get this:


That's all for now foks. Hope you enjoyed the photo show.
Sincerely, MissMommy & LittleMiss


Self-portrait photo of AVery Serious Artist at Work:

Sunday, April 1, 2012
PROJECT: Office Floors
The new floors have arrived & look great! Both of our offices now have vinyl flagstone floors & cherry wood chair mats! Next : paint those walls & get some curtains!


Thursday, March 29, 2012
PROJECT: Knobs


With over a dozen doors, this home had just as many different door knobs. Current project is removing the all discombobulated handles & replacing with aged/antiqued bronze knobs, handles, locks, & levels.
Let the restoration begin!
Tuesday, March 27, 2012
A Reuben (the wrong way good)
Since the grocery stores across the nation are against the idea of me making a proper reuben, I have successfully & continually substituted pastrami & rye (if making it the wrong way good).
The proper way to make a Reuben is to use corned beef & pumpernickel.

Freeze the bread (I typically keep my bread in the freezer, just 'cause).
Smear thick layer of butter on each slice of frozen bread.
(8 slices, making 4 sandwiches)
Drain 1 can of Frank's Sauerkraut
Open 1 package of deli sliced corned beef (or pastrami if making it the wrong way good)
Open 1 package of sliced swiss cheese
Open bottle of thousand island dressing
Heat griddle ~350ish
Throw on 'kraut
Throw on corned beef (or pastrami if making it the wrong way good)
Keep on the griddle only long enough to heat. Do not fry or cook the deli meat, otherwise it'll get all rubbery and nasty crunchy, which is definitely the wrong way and not at all good.
Remove from griddle & place in bowls near by.
Place the slices of bread, thick butter side down, on to the griddle.
Dollop of dressing on each slice.
Slice of swiss on each.
Then hot 'kraut on one side & hot corned beef (or pastrami if making it the wrong way good)

If you have any left over cheese slices, throw them on!
Keep on griddle until bread is golden & the cheese is melted.
Flip the corned beef (or pastrami if making it the wrong way good) covered slice onto a 'kraut covered slice.
Set aside to cool just a bit.
Slice diagonally, because your husband will think that is fancy.
Serve with a side of dressing for dipping & pickles.
Enjoy! We did!
The proper way to make a Reuben is to use corned beef & pumpernickel.

Tonight, we lucked out with pumpernickel & rye swirl bread!


Freeze the bread (I typically keep my bread in the freezer, just 'cause).
Smear thick layer of butter on each slice of frozen bread.
(8 slices, making 4 sandwiches)
Drain 1 can of Frank's Sauerkraut
Open 1 package of deli sliced corned beef (or pastrami if making it the wrong way good)
Open 1 package of sliced swiss cheese
Open bottle of thousand island dressing
Heat griddle ~350ish
Throw on 'kraut
Throw on corned beef (or pastrami if making it the wrong way good)
Keep on the griddle only long enough to heat. Do not fry or cook the deli meat, otherwise it'll get all rubbery and nasty crunchy, which is definitely the wrong way and not at all good.
Remove from griddle & place in bowls near by.
Place the slices of bread, thick butter side down, on to the griddle.
Dollop of dressing on each slice.
Slice of swiss on each.
Then hot 'kraut on one side & hot corned beef (or pastrami if making it the wrong way good)


If you have any left over cheese slices, throw them on!
Keep on griddle until bread is golden & the cheese is melted.
Flip the corned beef (or pastrami if making it the wrong way good) covered slice onto a 'kraut covered slice.
Set aside to cool just a bit.
Slice diagonally, because your husband will think that is fancy.
Serve with a side of dressing for dipping & pickles.
Enjoy! We did!
Deviled Chix!
My friend Ginny facebook-posted this instagram-picture of foods from a recent potluck she attended. After Pinteresting this, I learned that Ana made these; Ana rocks!
What an adorable idea!
Suggestions for eyes: peppercorns, capers, poppy seeds, caraway seeds, bacon-bits etc.
The eyes are dried chives & the beaks are carrot slivers!

Monday, March 26, 2012
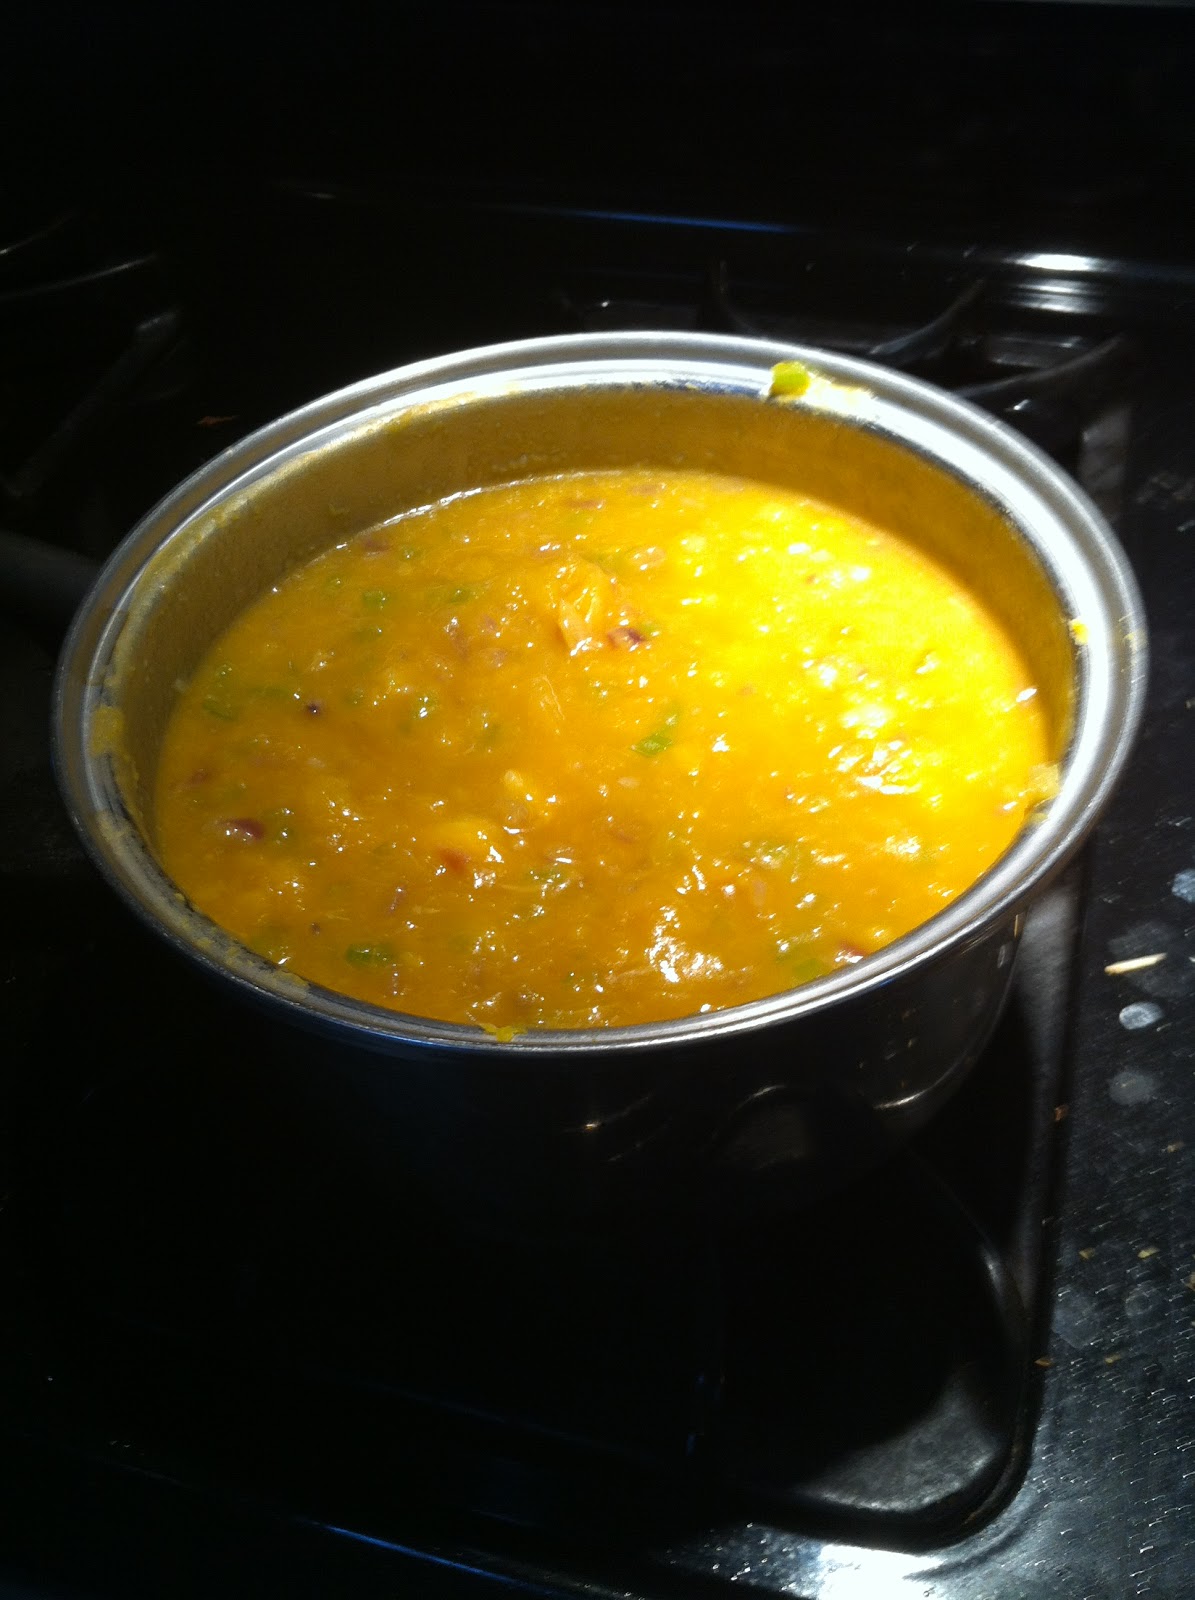
Blustery Day Roasted Garlic & Acorn Squash Soup

Tucking the garlic cloves inside the squash while roasting.

Thursday, March 22, 2012
Packing / Unpacking - Reuse Reuse Reuse Reuse
Yep! Petra's Projects is back online & have we got ourselves some projects!!!
Before we dive into the many restore/upgrade/renovate projects, we must unpack. That's right, we've moved again. This time we've moved back to a house that we have lived in before & still have dreams of bringing this poor thing back to life again with a lot of love, (& paint, & hardware, & electrical, & windows, & doors, & stained glass, & flooring, &, &, &, &, ...) Yet, again I am distracted!
Must unpack!
Packing materials can be expensive & I learned during my previous move, that sometimes the packing materials are not accepted in local recycling programs. (bummer). So, this time I used paper towels & paper bags to wrap & pack all my breakables. Very inexpensive compared to packing papers. AND everything I used is reusable, recyclable (in my area), & compost-able!

 I picked up a couple packages of paper lunch bags at the dollar store & now have lunch bags for lunch, puppets, gift wrapping, etc.

 I picked up a bulk package of paper towels at Costco & now have towels, napkins, water-colorable butterfly wings, etc.
 I stopped by my local grocery & purchased a 50cnt bundle of grocery bags for $2 & now have recycling containers, thick crafting paper, postal wrap, gift wrap, etc.
Before we dive into the many restore/upgrade/renovate projects, we must unpack. That's right, we've moved again. This time we've moved back to a house that we have lived in before & still have dreams of bringing this poor thing back to life again with a lot of love, (& paint, & hardware, & electrical, & windows, & doors, & stained glass, & flooring, &, &, &, &, ...) Yet, again I am distracted!
Must unpack!
Packing materials can be expensive & I learned during my previous move, that sometimes the packing materials are not accepted in local recycling programs. (bummer). So, this time I used paper towels & paper bags to wrap & pack all my breakables. Very inexpensive compared to packing papers. AND everything I used is reusable, recyclable (in my area), & compost-able!
Reusable, Recyclable, and Compost-able!

 I picked up a couple packages of paper lunch bags at the dollar store & now have lunch bags for lunch, puppets, gift wrapping, etc.
 I picked up a bulk package of paper towels at Costco & now have towels, napkins, water-colorable butterfly wings, etc.
We will have plenty of crafting supplies by the time packing is complete!
Sunday, January 30, 2011
Welcome home
We
are
excited
to
announce
a
new
little
Italian
to our family
Length 55.7 inches (1415 mm)
Volume 2.35 gal (8.9 L)
Single Cylinder, 4-stoke.
Continuously Variable (CVT)
Aprilia Scarabeo 250
 Welcome home,
SCAR!
Saturday, November 27, 2010
Ole Kuken

Ole Kuken !
2 1/2 cups warm milk
3 tsp yeast
1/2 cup sugar
(mix and let bloom)
2 eggs
2 tbsp melted butter
(whisk in)
5 cups flour
2 cups dried cranberries
(stir together until blended & sticky)
Let sit covered for a hour or so until doubled and fluffy.
Drop by spoonful into 350F deep hot oil. Fry until golden brown. Spin in the oil to get browned on all sides. Pull from oil and strain briefly. Roll in sugar. (this is the most important part) Then eat them!

Subscribe to:
Posts (Atom)