Thursday, January 10, 2013

Merry 12th Day of Christmas!!!

Merry 12th Day of Christmas!!! (a few days late)


Very blessed this Christmas to have spent the time with the in-laws before Christmas, a quiet time at home during Christmas, and the folks & step-brother up for the end of Christmas.


I must confess that this year's festivities were influenced by Pinterest.


For lunch at the Borchert's we brought Christmas Trees!


Green frosting on ice cream cones, decorated with mini M&Ms, topped with Reeses Peanut Butter Cups.

Pinterest Link


Then for actual tree decorating, I left that up to LittleMiss.   Or should I say "left that down to the lower right 1/8th of the tree within her reach"


 Sorry, got distracted by cuteness....


Okay, the 12th Day of Christmas menu --- what we ate!

Lunch:
Princess Aprilia's Purple Pumpernickel Bread
(used the bread machine's recipe for pumpernickle bread, but added a ton of purple food coloring; treated the same way as if making a red-velvet something, just it was purple)

Rueban Spread on Princess Aprilia's Purple Pumpernickel Bread
into crock pot on high until melty, then low just to keep warm:
  8 oz sour cream
  8 oz cream cheese
  8 oz shredded swiss cheese
  8 oz sauerkraut (not drained, use the juice too)
  14 oz chopped deli sliced Pastrami (2 pkgs, I think was 14 oz)
  1 tbsp (yep, that's a lot) slightly crushed caraway seeds
  2 tsp  slightly crushed fennel seeds

Platter of dill pickles, slices of pumpernickel, & some herbed mustard from an oktoberfest shopping spree.


Dinner:
Stars & Scribbles
Cut mini stars out of Pillsbury Cresent Roll dough & just squowooshed the leftover dough edges into similar sized bites.  Baked for slightly lesser time than what was on the package - watched to make sure they didn't burn.  

Pinterest Link that inspired stars & scribbles


Roasted Cranberry Country Butter
  7 pkgs of fresh cranberries
  1 pkg (lb) dark brown sugar
  4 cinnamon sticks
  2 peels of oranges
In very large roasting pan placed rinsed & sorted berries, in 300F oven, covered.  Cook for about an hour.   
Stirred with wooden spoon, mashing the berries that had popped open (which was most of them).   
Put in 4 cinnamon sticks strategically spacing them in the pan to optimal spice exposure.  Removed the peel from 2 large oranges.  Then using a filet knife removed the white pithy lining of the peel to only have the zest layer remaining.  (Someday I'll add a picture of that process). 
Bury the orange peels in the berries.  
Keep the lid on & reduce heat to 250F for another 2 hours.  Then I left it in the oven with the lid on & the oven closed overnight.  When completely, absolutely, totally cooled, if not cold, I pureed the berries in my food processor (in batches). (By the way, I removed the cinnamon sticks, but I did chop up the orange peels & pureed them in with the berry batches).   

If you were more organized than I, you would then heat up the pureed (now) butter then can in boiling method.  If you are me, then you put it in a sealed container out in the cool pantry & served it with 12th day of Christmas Dinner as a spread on the Stars & Scribbles, then give 'unsealed' jars to the guests & tell them to keep refrigerated!!!!
(no pinterest, just made that one up  --- don't tell Shane Quinters though!)

Slaw Salad & Crunchy Yummy
  1/2 head of red cabbage finely shredded
  1/2 cup of dried cranberries
  full bunch of fresh cilantro (I think it would have been about a cup)

Dressing:  in a mason jar, kept cold until ready to serve
  1 cup milk
  1/2 cup mayo
  1 tbsp dried dill (yep, that's a lot & I love it!)
  1 tbsp dried basil
  2 tbsp cider vinegar
  1 tsp black pepper

Crunch Yummy:  made a day in advance & kept in ziplock bag; sprinkled on top of slaw when served.
  zest of one orange
  1 tbsp sugar
    blended in coffee/spice grinder to make 'orange sugar'

  1/4 cup brown sugar put in small sauce pan on med hi & let melt without stirring.
  mix in the orange sugar, stirring, & allowing to melt.  Heat until just before boiling.  
  
  1 cup walnuts in heat tolerant bowl
  pour the heated sugar/syrup over the walnuts & stir carefully to completely coat the walnuts.  Then spread out on baking sheet. Baked in 350F oven for 30 minutes until edges slightly browned.  Let cool before cracking apart and storing in ziplock.

Inspired by Pinterest Links


Royal Potatoes
Made instant potatoes almost according to box instructions for 6 servings - didn't add milk & didn't add butter, only used water for total liquid amount.
 Let cool until cold.
 3 egg yolks
 1 tbsp dried basil
 1/2 stick of butter
 1/2 cup cream

Mix together & try to pipe into pretty shapes.  ONLY AFTER exploding two make-shift-pastry-bags-from-ziplocks, then roll in your hands to shape into 12 balls.  Place on parchment lined baking sheet.  Flatten the balls slightly and press your thumb to make a gravy holding divot.    Keep chilled until 1/2 hour prior to serving, at which time you bake for 30 minutes at 350F.  

Pinterest Link that inspired (technically it was from the show I watched on Food Network, but I also pinned it)


Mushroom Gravy
When you are setting the table, and realize that you have forgotten to make the gravy, do NOT panic.  Take a deep breath.  Turn to your mom & give her a whisk.  (No Dad, one can ever have too many whisks!!!!) Remember that you soaked, jarred, & refrigerated 1 cup dried mushrooms in 1 1/2 cups of boiling water two days ago for this exact need - earthy broth for gravy!

  2 tbsp flour into hot skillet, let brown, let Mom whisk it to evenly brown.
  1 cup mushroom broth - pour off liquid from that emergency jar.
Assure Mom that the lumps will blend in.  Then introduce the 'gravy' to the mini blender & blend away all the lumps that really won't blend in.   Take the roasted orange duck out of the oven.  Pray that there are drippings available, and mix it in the gravy.

(No Pinterest link for the gravy, as this is a 'trick' that I have been using for years.  I'm sure I saw it on a cooking show, but have since claimed it as my own.  MUhhhahahaha!!!)


Duck Ala Orange
From Epicurious (LINK)
Duck a l'Orange Gourmet | January 2006; originally published 1943  
Until recently, we had always thought of duck à l'orange as a tired cliché of the 1960s, so it was a surprise to find out how delightful this old recipe actually is. We have reduced the original quantity of sugar and caramelized it (along with the aromatic vegetables which balance out the sweetness) for a rich sauce with layers of flavor. One thing that hasn't changed: Cooking a whole duck still feels wonderfully extravagant.


2 ducks completely thawed & at room temp.
rinse in cold water, removing all the 'extras', curse your brother for making you eat chicken hearts and gizzards at a birthday meal, then forgive your brother and admire him, for that was good one!


2 leeks - the whole thing!  greens & all! chop in large pieces ~3 inches; swish & set deep bowl of cold water.  (this gets all the dirt out);  set out on towel to dry a bit. BUT NOT the duck towel!!!  


5 ribs of celery chopped to large pieces also ~ 3inches.

cover the entire bottom of the roasting pan with these sticks of celery & leeks.

Slice a pocket into each duck breast & slide in a 1/2 orange peel.
Fill each ducks' inner cavity with 
    ~ 10 sprigs fresh Thyme
    ~ 10 sprigs fresh Lemon Thyme
    ~ 10 sprigs fresh Rosemary
    ~  8  garlic cloves (peeled, but kept whole)
    ~  1 whole orange - sliced in half to expose juice/center
    ~  entire peel/zest of another orange

Tie up the legs and wrap the wings around in a crazy yoga pose to use a 'natural' roasting rack.

Cover & roast at 450F for 45 minutes.  Turn down to 350F and roast for 2.5 hours

(Kicking myself for not taking pictures!!!  THESE were GORGEOUS!!!)

Orange Sauce
1 cup of water boiling
4 orange peels/zest
boil ~15 minutes
remove peels
add some mushrooom stock ( few tablespoons )
pinch of lemon thyme
1/4 cup brown sugar
Mix in the two bags of orange sauce that were shoved in the duck from the store.
Keep warm until serving.

Stuffing Bacon Cups 
1/2 lb bacon, room temp, super stretchy
turn muffing tin upside-down
cut a piece of parchment/foil to cover each inverted cup.
drape, criss-crossing, & wrapping raw bacon over each inverted cup.
put on baking sheet to catch drippings & prevent the oven from catching on fire from bacon grease draining on bottom of oven --- not what I was EVER have such an experience - wink ---
Bake at 275F for about an hour, check on the it frequently.  
You want to cook it until it's completely cooked through, but you don't want to bake too hot, other wise the bacon will shrink too quickly.  The bacon DOES shrink - it's supposed to!  It seems to be more even & retain the cup shape better at this lower temp.
Turn off the oven, keep the bacon in there & let completely cool.
I then kept the parchment/foil piece in the cup, and stacked them together, put in ziplock, and stored in fridge.

2 pkgs of Italian sauage - pan fry & completely crumble.  Toward the end of frying put a TON of dried sage & a whole lot of "Italian" dried seasonings.  Remove from pan & let cool.

In the same pan that has all the crunchy, greasy, mess from the sausage, fry :
3 finely chopped ribs of celery
1 finely chopped leek 
6 finely chopped cloves of garlic

Pour in 2 cups of HOT chicken broth.
Scraping the pan (No Dad, with a WOODEN spoon.  No worries no scratches)

While still hot & very moist, add in 
1 cup of finely diced dried papya
1/2 cup dried cherries
1/2 cup dried cranberries

In large bowl stir this & the sausage all together.
Let cool.
Add 2 boxes of stuffing bread mixes (purchased from Christmas clearance)
4 eggs - mix, toss, coat.

Press into 9x 13 baking dish & bake  350F for an hour.
Let cool, cover & refrigerate until the dinner day.

30 minutes prior to serving, put bacon cups INSIDE muffin cups, scoop in the stuffing into each cup & bake 350F for 30 minutes.   


Another Pinterest Link that inspired (technically it was from the show I watched on Food Network, but I also pinned it) 


Dessert

Chocolate Decadence 
Ingredients: 
4 tablespoons virgin COCONUT OIL
1 cup MILK chocolate chips
1 cup plain, unsalted cooked BLACK BEANS, rinsed and drained  1 cup raw CASHEWS, soaked 4 hours, rinsed and drained 
1 cup water
1/2 cup honey 1/2 cup COCOA POWDER 
2 tsp Baking POWDER

Directions: 
Preheat oven to 325˚F. 
Oil bottom and sides of one 9" round springform cake pan. Dust with cocoa powder. 
Combine and gently heat coconut oil and chocolate chips just to soften.  (I used the microwave to melt)
In food processor I combined black beans, cashews, water, & honey.  Blended on high for several minutes to get completely smooth. Blended in powders & melted chocolate.
Poured into prepped pan.  
Baked 1 hour.
The cake rises & falls at it cools. 
After cool, keep in refrigerator.

Top with stabilized whipped cream


I THINK that was everything!  Mom, Dad, Bro, 

did I forget anything????


Roast duck in the foreground, the princess potatoes in the background.
 
 
 Stuffing cups & orange sauce


 Chocolate Decadence Royal King Cake with hidden chocolate candy piece.

Saturday, December 15, 2012

across the sky & down from heaven, that's the way we write a seven

I find it slightly amusing that I now love analysis and reporting.  My dream job is turning numbers into actionable pictures - trending, modeling, patterns.
  

Being dyslexic, reading & comprehension have always been a difficult struggle.  

Over the years, coping skills have been developed, 
                                      both intuitively 
                                                    & 
                                                 intentionally.  


Amazon Link :  amazon.com/Heres-Looking-Euclid-Surprising-Astonishing


While reading the book "Here's Looking at Euclid" , a vivid memory of kindergarten came to mind: "across the sky & down from heaven, that's the way we write a seven".  I remember finding extreme comfort as a young one, realizing at that moment, barely sitting still on the carpeted floor of the library : numbers are not random scribbles.  
There was hope!


Now with a blessed preschooler learning her numbers, MissMommy went on an internet field-trip on search for the fun rhymes that had brought such comfort & revelation back in the day.


Great Website on Math: http://www.mathforgrownups.com/ode-to-special-numbers/
Collected from several different online chat rooms:


0 - Around to my left to find my hero, back to the top, I've made a zero
1 - A downward stroke, My that's fun. Now I've made the number one.
2 - Half a heart says, "I love you." A line. Now I've made the number two.
3 - Around the tree, Around the tree, Now I've made the number three
4 - Down and across and down once more. Now I've made the number four
5 - The hat. The back. The belly. It's a five. Watch out, it might come alive
6 - Bend down low to pick up sticks. Now I've made the number six.
7 - Across the sky and down from heaven. Now I've made the number seven
8 - Make an "S" and close the gate. Now I've made the number eight.
9 - Make an oval and a line. Now I've made the number nine.
10 - One egg laid by a hen. Now I've made the number ten.


http://www.nationalkindergartenreadiness.com/2011/04/number-tracing-pre-k-worksheets/
Tracing worksheets available at national kindergarten readiness website.


Number 1 is like a stick,
One straight line that is very quick.

For number 2, go right around,
Then make a line across the ground.

Go right around, what will it be?
Go round again to make a 3.

Down and over, and down some more.
That’s the way to make a 4.

Go down and around, then you stop,
Finish the 5 with a line on top.

Make a curve, then make a loop,
There are no tricks to make a 6.

Across the sky and down from heaven,
That’s the way to make a 7.

Make a “S” and then don’t wait,
Go up again to make an 8.

Make a loop and then a line,
That’s the way to make a 9.

Make a 1 and then an 0 –
10 are all your fingers, you know


http://liz-chan.blogspot.com/2011/06/woody-number-set-and-dyi.html


Around and round and round we go, when we get home we have a 0.

Start at the top and down we run, that's the way we make a 1.


Around and back on the railroad track, 2, 2, 2.


Around the tree and around the tree, that's the way we make a 3.


Down and over and down some more, that's the way we make a 4.


Down and around and a flag on high, that's the way we make a 5.


Around to a loop, number 6 rolls a hoop.


Across the sky and down from heaven, that's the way we make a 7.


Make an S and do not wait, when we get home we have an 8.


Make a loop and then a line, that's the way we make a 9.


Thursday, November 8, 2012

He can call me Flower, if he wants to...

I love flowers. 
Sunflowers are my super favorite because they are big.
No, wait, Tulips are my favorite, because they look waxy like crayons & are the first flowers of the season, & they are Dutch.
No, wait, Roses are my favorite, because they smell like, well, roses!
No, wait.... who am I kidding?

Let's just say that I like flowers.

The truth of the matter, is that as much as I like flowers, flowers & plants do not like me... Until recently.

I have found that if I convince the plant that it is in LittleMiss' garden, they don't realize that she's only three, and that I'm really the one tending the garden.  shhhhh.... don't tell the plants or LittleMiss.

Since the snow is forecast to fly again this week, next year's garden planning can officially begin!

special seed storage box
Here's who made my special seed storage box sometime before 1903.
Most of our local stores have the clearance sections of seed packets - from which I now stock up.  Packets that were $2 are now $0.25 and that makes me a happy girl.

We had major clean-up landscaping done this summer to our yard which now has provided me LittleMiss with ample gardening space.  (no worries, the bbhoop does not remain in the garden)

The Focal Garden

The Focal Garden is almost centered in front of our home at the edge of the yard.  I call it our Focal Garden, because it can be seen from all rooms (except the bathrooms).   It's a bright & sunny spot that grows weeds very very very well!

2013 Focal Garden shall be TULIPS & LILAC !!!!
then SUNFLOWERS & Roses & other stuff too!!!

Focal is flanked by two lilac bushes, that will probably NOT bloom this year.  We had carved out intertwining vines from them, that resulted in some significant trimming back.  Since we've cut most of the new growth off & next year's buds are part of this year's new growth, we will miss out on lilac flowers this round.  But watch out 2014!  There will be some serious Lilacing!

Over 200 tulips & daffodils are strategically scattered through the focal garden.   There is one rose bush that was part of a divide-conquer-transplant project during the landscaping/clean-up battle.
So far all of the seed packets have been collected, sorted, organized, selected, and arranged.  Most, if not all, of these seeds will be wintering over in a lovely box with zip-bags of seed packets.   Then when I just can not wait any longer, the seeds will be planted in seed trays indoors & sprouting into little baby plants that will be ready to grow big & strong in LittleMiss' Focal Garden after the tulips finish blooming.

Drum roll please.....   queue the Skunk from Bambi....   "ahhh.... he can call me flower if he wants to..."    

           The 2013 Focal Garden!

Everything here is pickable for bouquets!  Maybe the sunflowers seeds will be edible too!  I have the tallest sunflowers nearest the birch trees.  I'm thinking that if I need to help prop them up, I can rope around the stalks to the birch trees for support.   The layout is intentionally not symmetrical.  I have a hard enough time dealing with the abstract spacing of the birch trees.  If I had tried to be symmetrical, I would have gone even more crazy since they won't grow at the exact same times & sizes.  My poor Monk-brain.  

Speaking of obsessive, I've already marked my calendar to seek out some good mulch, compost, fertilizer, and dirt to work into the garden as soon as the tulips start to bloom next spring.  I then have a couple of weeks for that amended soil to settle in, and get ready for the baby plants.

Ooohh, I'm so excited for next year, that I'm going to do laundry & make myself some hot cocoa!

Wednesday, October 3, 2012

Creamy Rueben Spread

This is a shout-out-recipe to MissLyndsay!

This recipe experiment has been brought to you by my wonderful friend MissLyndsay, who recently brought her family to spend a weekend at our house.  Her only request was coffee & German Food.  After having this creamy reuben spread on dense pumpernickel & sunflower German breads, with side of dill pickles, we enjoyed a dinner of rouladen, spatzle, red cabbage with apples, kraut, & apple crisp.


 .  Creamy Rueben Spread  .
16 oz cream cheese  (2 8oz bricks)
16 oz chopped thin deli sliced corned beef
16 oz Swiss Cheese (shredded 2  8oz blocks)
16 oz Crisp Sauerkraut (canned kraut)
16 oz Sour Cream


Germanic Food has had a wonderful influence in both MrMan's & My life.  For a few years we lived on the West Coast & truly missed the Good German food.   Having returned to the Midwest we have found the recent economy has negatively affected our favorite restaurants.  Thankfully, we still have a few places that seasonally surprise us with good food during Oktoberfests.   On a recent date-night, we had the pleasure of experiencing a creamy rueben dip, which the restaurant owner provided us the recipe.   For those of you who know me, you know that I can't leave a recipe well enough alone.  So, I doubled both the kraut & beef. The cream cheese, sour cream, & swiss cheese were all placed in a crockpot on high.   The chopped, sliced corned beef along with the kraut was heated up briefly in a frying pan on high.  Added the hot kraut & beef to the melted creamy cheesy goodness in the crockpot.  We let this set for a couple hours on low to keep warm until the guys were ready for lunch.  


Thursday, September 13, 2012

Potty Training : Plan B


After a long bout of good training, LittleMiss has hit the tantrum-throwing-wall.

 Plan B : POTTY PARTY!!!

The one-day potty training didn't work for her, because she decided that was really only a one-time-event! (Much like how I was frustrated to learn that I needed to go to kindergarten again after the first day.)

This 
Potty Party 
is 
 LONG-TERM, 
REPETITIVE,
 & 
REWARDING!

Every time she puts potty in the toilet (yes, we must be that specific with my Little Literal Lass), she gets to put a BIG sticker on a plate that is stuck on the wall.  After all five plates are filled with a big sticker on each, then she gets to open the prize at the top!  

The doorway to the bathroom is lined with balloons, the shower curtain has sparkly streamers, and there are sparkles on the counters.  

All of this is very visual & tactile for her to keep it top of mind, not out-of-sight-out-of-mind.

As each set of plates fill, they are replaced with new plates & a new prize at the top.  The completed set is moved to the window across from the toilet for her to look at how well she has already done!  (Keeping it visible).

Everything used in this party is from a dollar store & I spent less than $25 dollars.


What ideas have you used to potty train?

Sunday, August 12, 2012

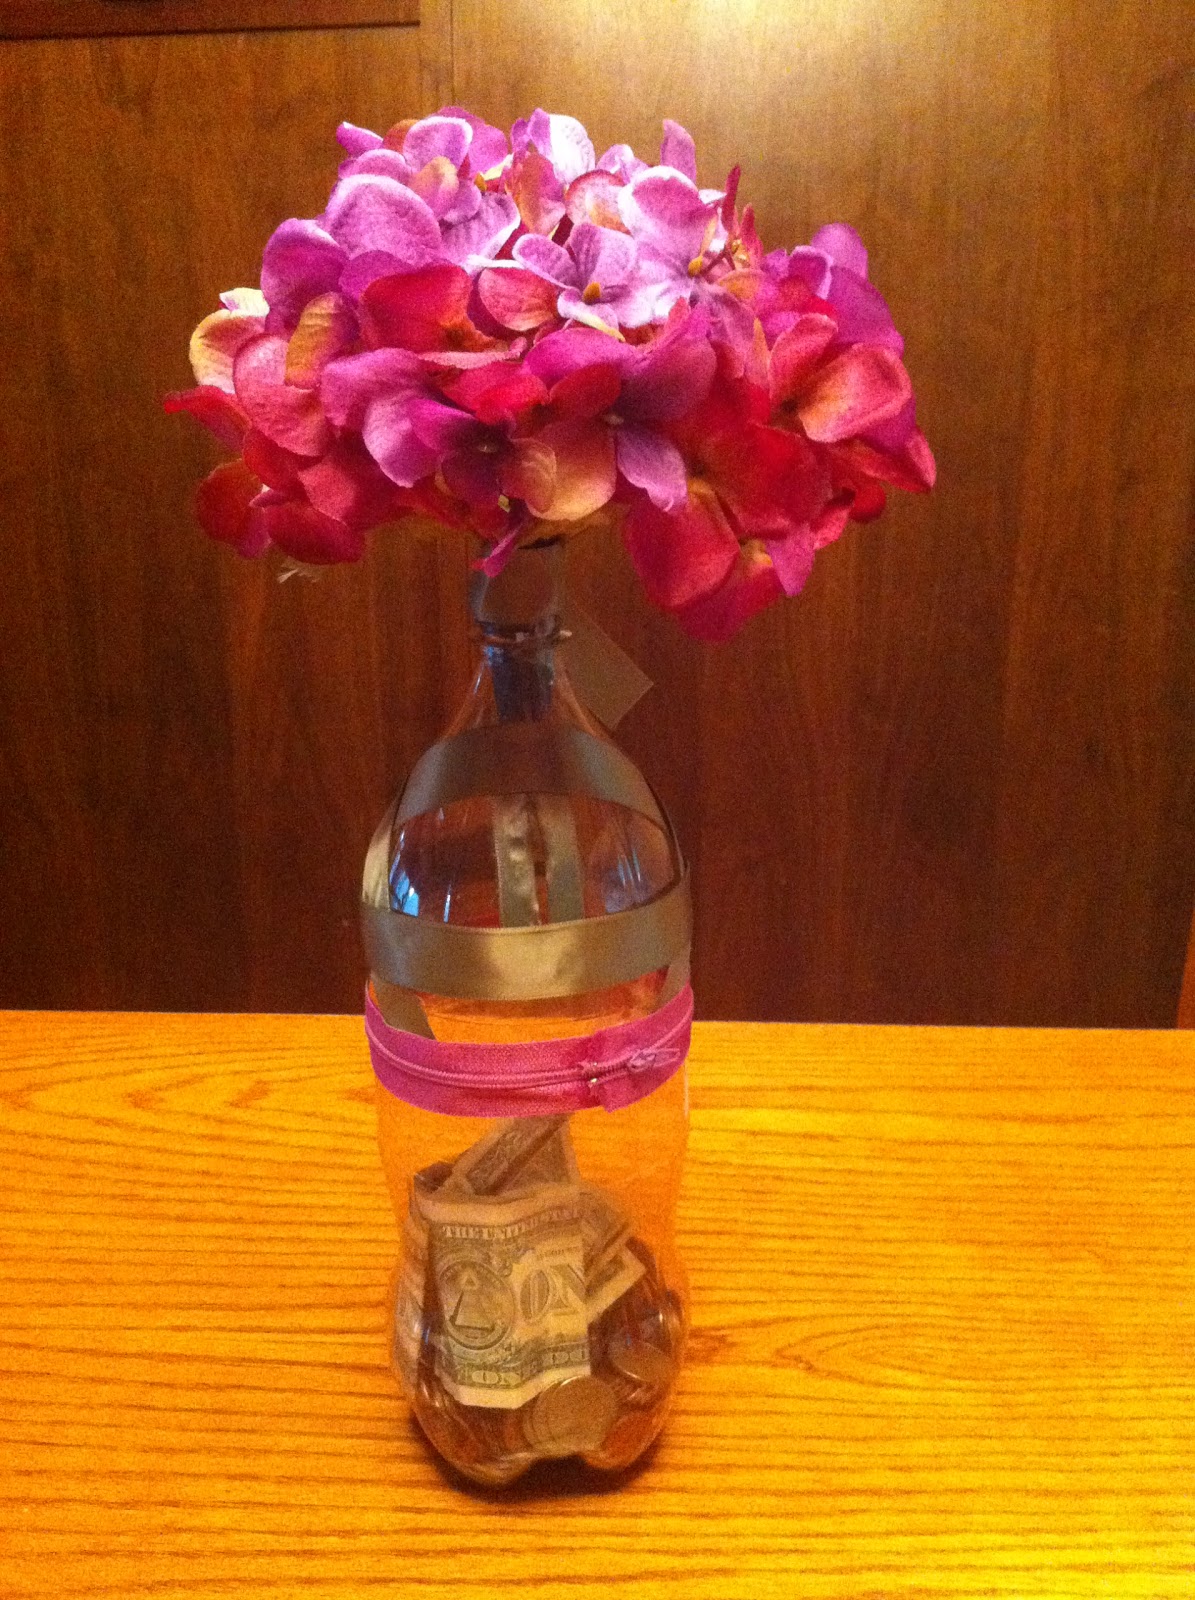
2L bottle penny bank

Slice 2L bottle in half.
Glue each side of a 14" zipper to the halves, putting the bottle back together.
Slice a slot for money & wrap with ribbon to prevent sharp edges from getting little fingers.
Remove cap & top with bouquet.
Criss-cross ribbon for fun.

Proverbs 13:11 '..Whoever gathers money little by little makes it grow".


Sweet Cake: Almost too sweet to eat, yet I can't stop eating it!!!

This is another shout-out to Miss Lisa!!!

SWEET cake

I really don't like calling dump cakes "dump".
After devouring the cake, we have decided to call this SWEET cake.  The "sweet" much be capitalized or else one might be liable for causing diabetic shock.


1 can Cherry Pie Filling
1 can Crushed Pineapple
1 box Yellow Cake Mix
1 stick of butter
(secret ingredient: Crazy Baby Helper)


Spritz a cake pan w/ oil.


Poured in the Cherry Pie Filling
Smoothed out.


Poured in the Crushed Pineapple.
Smoothed out.
 

Sprinkled on the entire box of Yellow Cake Mix.
 

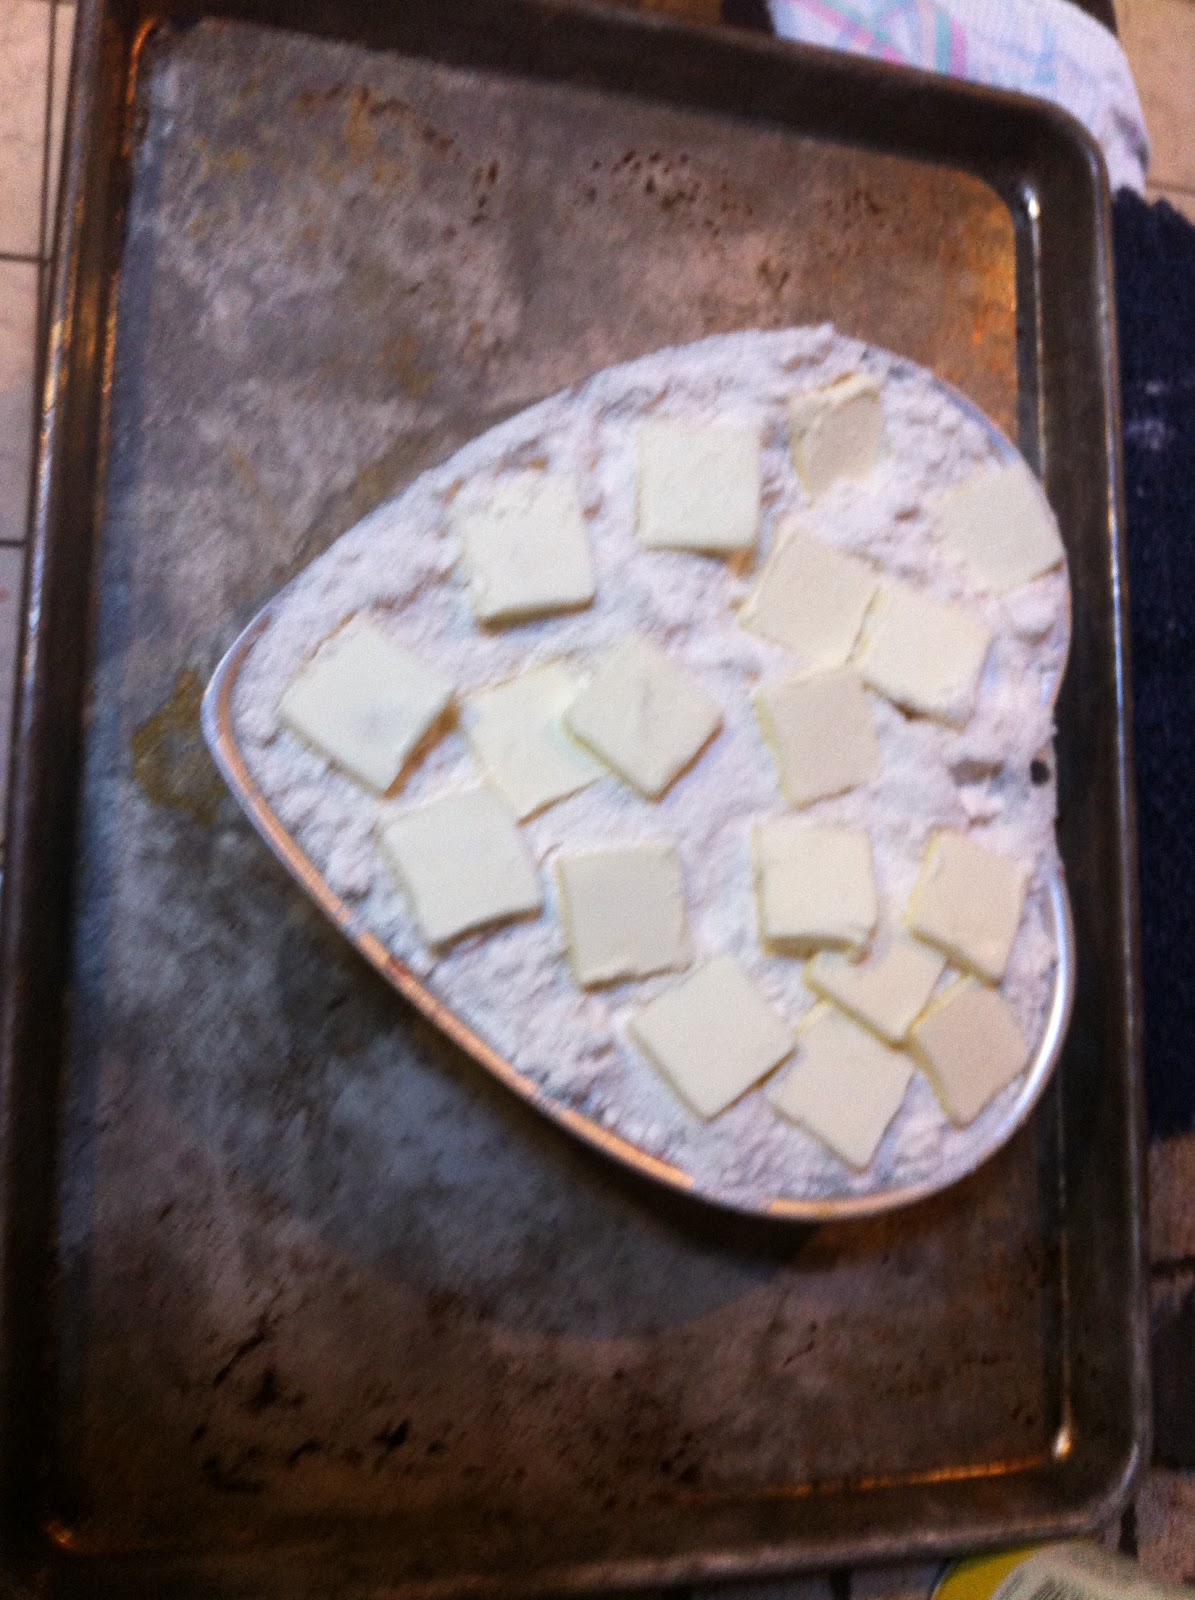
Cover the top with slices from an entire stick of butter.


Put on tray.
Put in oven.
Bake:  350F for 1hour until top is golden brown & edges are bubbley

 
Drool.

Cool.

Drool.

Eat.


Sunday, June 17, 2012

Recycle Bottle Lamps!

These are such a cute idea!!! Current features on FAB.com, these lamps by AbyuLighting.com add fun & whimsy to reusing recyclables.

Friday, June 15, 2012

Pineapple Right-Side-Up Cakes!

This post goes out to Wonderful Lisa Wilson!

1 can of pineapple pie filling (20oz)
1 box of angel food cake mix. (1lb)

Be sure to get the cake mix that is "add water only" as directions, but do NOT add any water!!!

1)  Line a jelly roll pan w/ foil & lightly spray w/ oil.

2)  Carefully, very very very slowly, fold in the pie filling into the cake mix.  The cake mix expands quickly with if you mix too much.  You do not want this to rise. You want to keep it as flat as you can. Fold it only until most of the powder is moistened.  There will be some powder not mixed and that is exactly what you want. 
  So, 

do NOT beat.  

do NOT follow the box instructions. 

do NOT use a mixer.  


3) Pour the batter onto the oiled foiled pan. 

4) Spread softly to a rectangle shape, but do NOT spread to edge of pan!
Keep the batter with at least a 1 inch space to the edges of the pan.  
This will allow the batter to expand without rising.

5) Bake for 20 minutes at 350F.

6) You MUST set up a chair in front of the oven, 
have a cup of coffee, 
and your pintrest app at hand, 
because you will 

NEED TO WATCH 

THIS CAKE BAKE!!!  

Seriously.  

If you mixed the batter too much, it will rise over the edge of your jelly roll pan.  If you see this start to happen, remove the pan immediately from the oven and scoop out a bunch of the batter from the sides.  Then return to the oven & finish baking.

7) Remove the pan from the oven after completed baking.  The edges should be slightly golden, but NOT burnt.  (again, if you were sitting in front of the oven you would notice)

8) Sprinker the entire rectangle with powdered sugar.

9) While the cake is still warm, drain a can of pineapple slices & cut the cake into individual circle cakes by pressing the empty can into the cake like a cookie cutter.


10) Transfer each individual cake to a cooling rack.  


11) Sprinkle w/ powdered sugar


12) Top with each cake with a pineapple ring (from that can you just drained, remember)  and a maraschino cherry.


 There you have individual Pineapple Right-Side-Up Cakes.

Lisa, we'll need to do your dump cake next!